

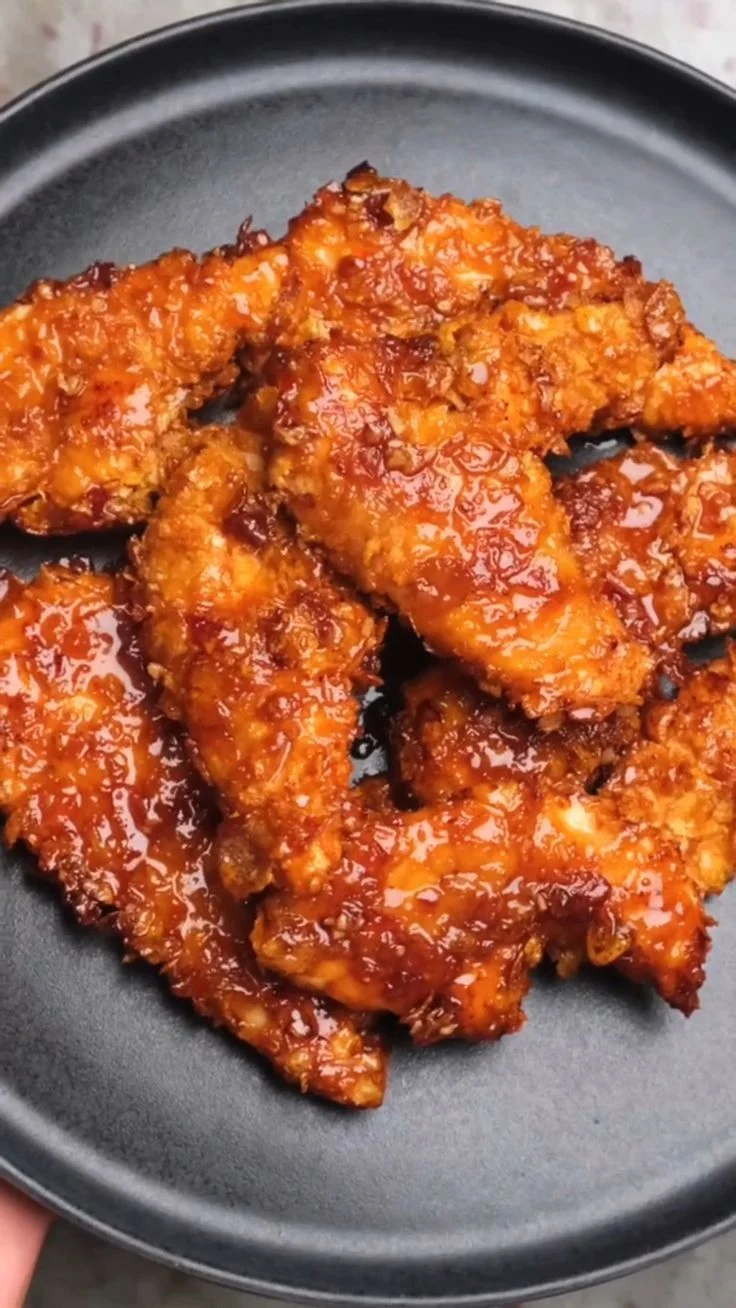
Crispy Magic is the name I gave this recipe after the fourth time a friend asked me what the secret was. The answer is a three-step coating of seasoned flour, buttermilk, and panko tossed with a little oil, which fries into a coating that actually stays crunchy instead of steaming itself soggy on the plate.
The chicken is pounded to an even thickness so the outside turns deep golden at the same moment the inside hits 165F (74C). That single detail is the difference between crispy chicken and crispy chicken with a pink middle, and it takes about five minutes with a rolling pin.
Serve it with a lemon wedge and something cold and creamy, and you have a dinner that competes with any fried chicken spot, using one skillet and one baking sheet.
Why You'll Love This Recipe
About the Ingredients
6 boneless, skinless chicken thighs (about 1 3/4 lb / 800g)
Thighs stay juicier than breasts at high heat. If you only have breasts, use 4 and pound them to 1/2 inch so they cook through before drying out.
1 1/2 cups (360ml) buttermilk
Full-fat buttermilk gives the best adhesion and tenderness. No buttermilk? Stir 1 1/2 tablespoons lemon juice into 1 1/2 cups whole milk and rest 10 minutes.
1 1/2 cups (180g) panko breadcrumbs
Panko's large flakes are what make the crust shatter. Coarse homemade dried crumbs work, but fine dry crumbs turn pasty, so pulse them with a tablespoon of cornstarch.
1/2 cup (60g) all-purpose flour
Flour is the glue layer that helps the egg wash grip. Swap in cornstarch for a gluten-free version with an even crispier, glassier shell.
1 large egg
The egg binds the crumbs to the flour so the coating does not slide off in the pan. A flax egg (1 tablespoon ground flax plus 3 tablespoons water) works in a pinch.
3 tablespoons neutral oil, plus 1/2 cup (120ml) for frying
Canola, vegetable, or peanut oil all hold up to medium-high heat. Peanut oil gives the most restaurant-style flavor and a higher smoke point.
1 1/2 teaspoons kosher salt, divided
Kosher salt seasons more evenly than table salt. If using fine table salt, cut the amount to 1 teaspoon total.
1 teaspoon smoked paprika
Smoked paprika adds color and a subtle campfire note. Sweet paprika or a half teaspoon of cayenne are good swaps if you want less smoke or more heat.
1 teaspoon garlic powder
Granulated garlic disperses better than fresh, which can burn in the pan. Onion powder can stand in for half of it.
1/2 teaspoon freshly ground black pepper
Fresh-cracked pepper tastes brighter than pre-ground. White pepper gives a sharper, more traditional fried-chicken bite.
1 lemon, cut into wedges, for serving
Acid cuts through the richness of the crust. Lime wedges or a splash of vinegar-based hot sauce do the same job.
Tips & Tricks
Do not skip pounding the chicken
Uneven thickness is the number one reason one piece burns while another stays pink. Pound thighs to an even 1/2 inch (1.25cm) between two sheets of plastic wrap.
Keep the oil at medium, not high
Oil that is too hot browns the panko before the chicken cooks. Aim for 350F (175C) and adjust the burner as you go.
Press the crumbs on firmly
Loose crumbs fall off and leave bald patches. Cup the panko in your palm and press it into the chicken until it looks thick and even.
Rest on a rack, never a paper towel
Paper towels trap steam and soften the crust. A wire rack over a sheet pan lets air circulate underneath.
Pro Tips
Step-by-Step Instructions
1. Pound the chicken
Place each thigh between two sheets of plastic wrap and pound to an even 1/2 inch (1.25cm) thick. Pat completely dry with paper towels, then season both sides with 1 teaspoon of the kosher salt and the black pepper.
2. Set up the coating
Set out three shallow dishes: flour mixed with garlic powder and smoked paprika in the first, buttermilk mixed with the egg in the second, and panko tossed with the remaining 1/2 teaspoon salt and the 3 tablespoons of oil in the third.
3. Dredge and press
Coat each thigh in flour, shaking off the excess, then dip in the buttermilk-egg mixture, letting the extra drip back into the dish. Press firmly into the panko on both sides until fully covered.
4. Rest the coating
Set the breaded chicken on a wire rack and let it sit for 10 minutes while the oil heats. This short rest hydrates the crumbs so they grip the chicken instead of flaking off.
5. Heat the oil
Pour the 1/2 cup (120ml) oil into a large heavy skillet and heat over medium heat to 350F (175C), about 4 to 5 minutes. A panko crumb dropped in should sizzle and bubble immediately.
6. Fry the first side
Fry 3 thighs at a time for 5 to 6 minutes, undisturbed, until the underside is deep golden brown and the edges look crisp. Adjust the heat if the crumbs darken faster than the chicken cooks.
7. Flip and finish
Flip and cook 4 to 5 minutes more, until the second side is golden and an instant-read thermometer in the thickest part reads 165F (74C). Transfer to a clean wire rack and repeat with the remaining chicken.
8. Rest and serve
Let the chicken rest 5 minutes so the juices settle, then serve hot with lemon wedges and flaky salt. The crust stays crisp for about 20 minutes, so serve promptly.
Delicious Variations
Spicy Honey Butter
Whisk 3 tablespoons hot honey with 2 tablespoons melted butter and brush it over the chicken right after frying for a sticky, sweet-heat glaze.
Parmesan Herb Crust
Replace 1/2 cup of the panko with finely grated Parmesan and add 1 teaspoon dried oregano to the crumbs for an Italian-leaning version.
Air Fryer Crispy Chicken
Spray the breaded thighs generously with oil and air fry at 400F (200C) for 12 to 14 minutes, flipping once, until golden and 165F (74C) inside.
How to Store Crispy Magic Crispy Chicken Recipes
Refrigerator
Store cooled chicken in an airtight container in the refrigerator for up to 3 days. Keep it in a single layer if possible so the coating does not get crushed.
Freezer
Freeze breaded, uncooked chicken on a sheet pan for 1 hour, then transfer to a freezer bag for up to 2 months. Cook from frozen, adding 3 to 4 minutes per side.
Reheating
Reheat on a wire rack over a sheet pan at 400F (200C) for 8 to 10 minutes to restore crunch. Avoid the microwave, which steams the coating into mush.
Frequently Asked Questions
Q: Why did my crispy chicken coating fall off?
The coating falls off when the chicken is too wet or the crumbs are not pressed on firmly. Pat the chicken bone dry, let the egg wash drip off before breading, and press the panko into the surface until it looks thick and even.
Q: Can I make this crispy chicken in the oven instead of frying?
Yes, bake it on an oiled wire rack at 425F (220C) for 20 to 25 minutes, flipping once, until it reaches 165F (74C). The rack lets hot air circulate under the chicken so the bottom crisps instead of going soggy.
Q: What is the best oil for frying crispy chicken?
Peanut, canola, or vegetable oil are the best choices because they have high smoke points and neutral flavor. Olive oil is not ideal here since it smokes at the temperature needed for a crisp crust.
Q: How do I know when crispy chicken is fully cooked?
An instant-read thermometer inserted into the thickest part should read 165F (74C). The juices should run clear and the coating should be deep golden brown with bubbling edges.
Q: Can I use chicken breasts instead of thighs?
Yes, but use 4 breasts and pound them to an even 1/2 inch (1.25cm) so they cook through without drying out. Breasts cook faster than thighs, so start checking at 4 minutes per side.
Make this Crispy Magic chicken tonight and listen for the crunch at the table, then tell me in the comments whether you went classic lemon or spicy honey.
Crispy Magic Crispy Chicken Recipes
Crispy Magic crispy chicken recipes deliver shatteringly crunchy golden coating with juicy meat inside, ready in about 50 minutes for a weeknight win.
🧂 Ingredients
- 6 boneless, skinless chicken thighs (about 1 3/4 lb / 800g)
- 1 1/2 cups (360ml) buttermilk
- 1 1/2 cups (180g) panko breadcrumbs
- 1/2 cup (60g) all-purpose flour
- 1 large egg
- 3 tablespoons neutral oil, plus 1/2 cup (120ml) for frying
- 1 1/2 teaspoons kosher salt, divided
- 1 teaspoon smoked paprika
- 1 teaspoon garlic powder
- 1/2 teaspoon freshly ground black pepper
- 1 lemon, cut into wedges, for serving
📋 Instructions
- 1Pound the chicken — Place each thigh between two sheets of plastic wrap and pound to an even 1/2 inch (1.25cm) thick. Pat completely dry with paper towels, then season both sides with 1 teaspoon of the kosher salt and the black pepper.
- 2Set up the coating — Set out three shallow dishes: flour mixed with garlic powder and smoked paprika in the first, buttermilk mixed with the egg in the second, and panko tossed with the remaining 1/2 teaspoon salt and the 3 tablespoons of oil in the third.
- 3Dredge and press — Coat each thigh in flour, shaking off the excess, then dip in the buttermilk-egg mixture, letting the extra drip back into the dish. Press firmly into the panko on both sides until fully covered.
- 4Rest the coating — Set the breaded chicken on a wire rack and let it sit for 10 minutes while the oil heats. This short rest hydrates the crumbs so they grip the chicken instead of flaking off.
- 5Heat the oil — Pour the 1/2 cup (120ml) oil into a large heavy skillet and heat over medium heat to 350F (175C), about 4 to 5 minutes. A panko crumb dropped in should sizzle and bubble immediately.
- 6Fry the first side — Fry 3 thighs at a time for 5 to 6 minutes, undisturbed, until the underside is deep golden brown and the edges look crisp. Adjust the heat if the crumbs darken faster than the chicken cooks.
- 7Flip and finish — Flip and cook 4 to 5 minutes more, until the second side is golden and an instant-read thermometer in the thickest part reads 165F (74C). Transfer to a clean wire rack and repeat with the remaining chicken.
- 8Rest and serve — Let the chicken rest 5 minutes so the juices settle, then serve hot with lemon wedges and flaky salt. The crust stays crisp for about 20 minutes, so serve promptly.